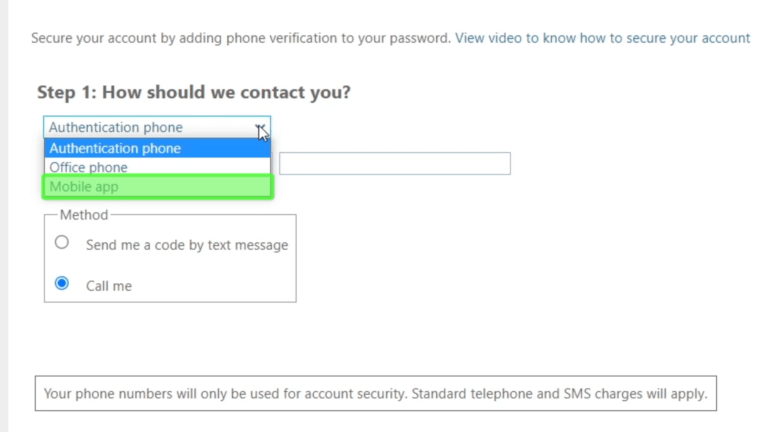
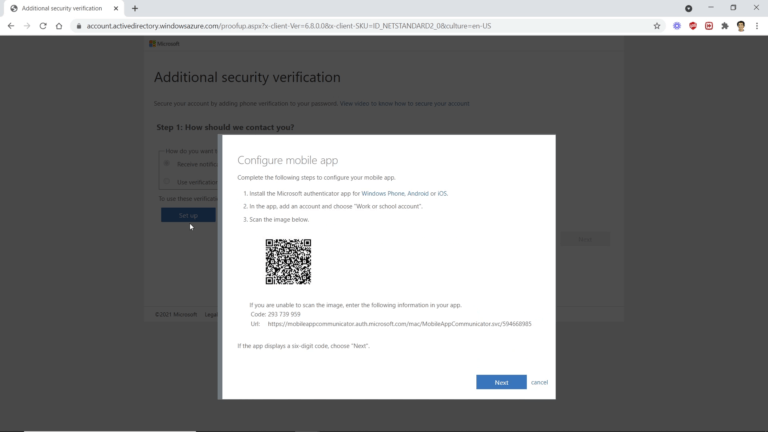
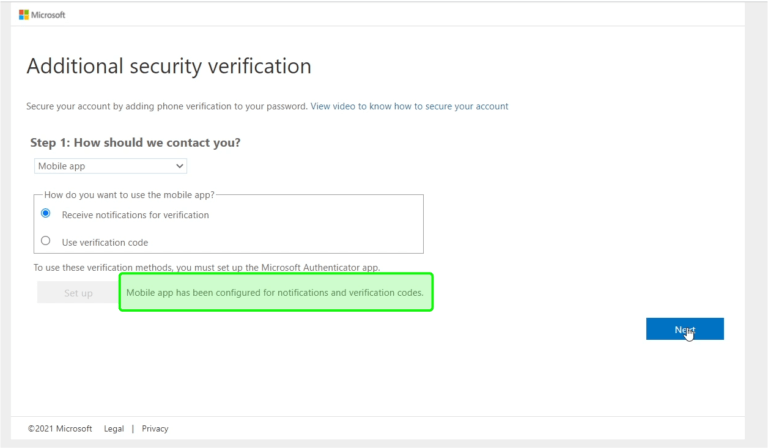
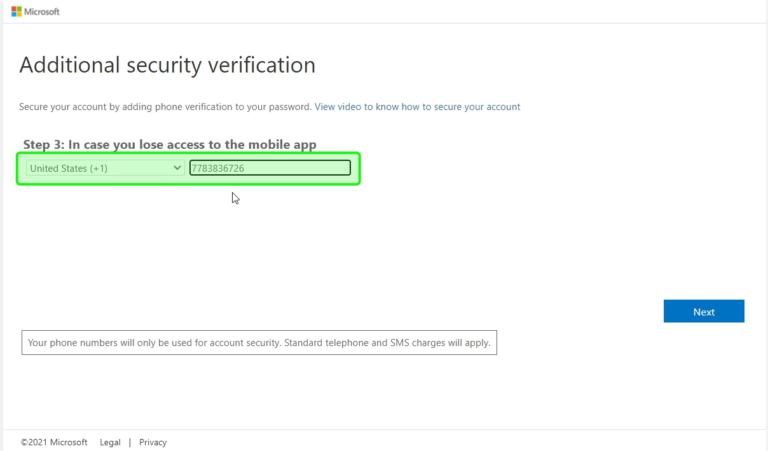
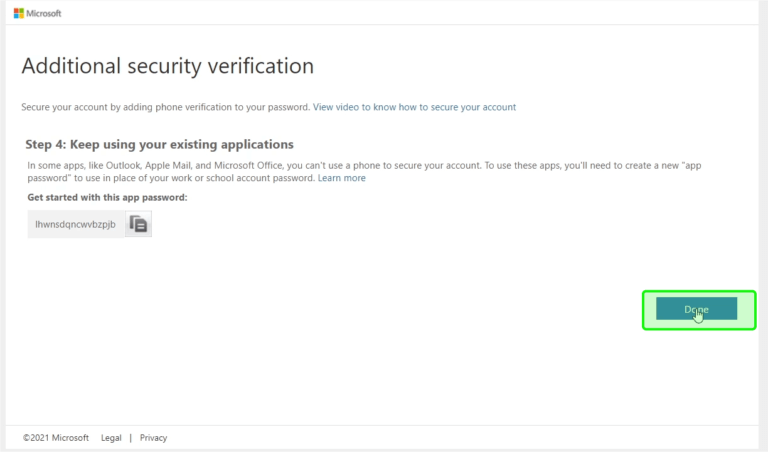
Set Up MFA on Your Microsoft 365 AccountBy Ryan Kononoff / June 17, 2021 / Cybersecurity The last thing you want is for your accounts to get hacked. That’s why we’re going to show you how to set up MFA (Multi-Factor Authentication) on your Microsoft 365 account.If you’re not sure what MFA is, check out this blog post for more information Let’s Get StartedOn your computer, go to this website: https://aka.ms/mfasetupSign in like you normally would and click “Next”. On the drop down, select “Mobile app”. Check “Receive notifications for verification”. Click “Set up”. Your screen should look like below: On your phone, download the Microsoft Authenticator app. Open the app and agree to the privacy notices, then tap “Scan a QR code”. Scan the QR code on your screen You should see text that says “mobile app has been configured”.If you don’t see this text, you will need to re-scan the QR code.On your computer, click “Next”. Back on your phone, tap “Approve”. On your computer, enter your mobile phone number when prompted. Click “Next”. Click “Done” to finish setup. Congratulations!You’ve finished setting up multi-factor authentication!Your account is now much more secure than ever before!If you would still like to go over this setup step-by-step, feel free to contact us! Tags: MFA Windows